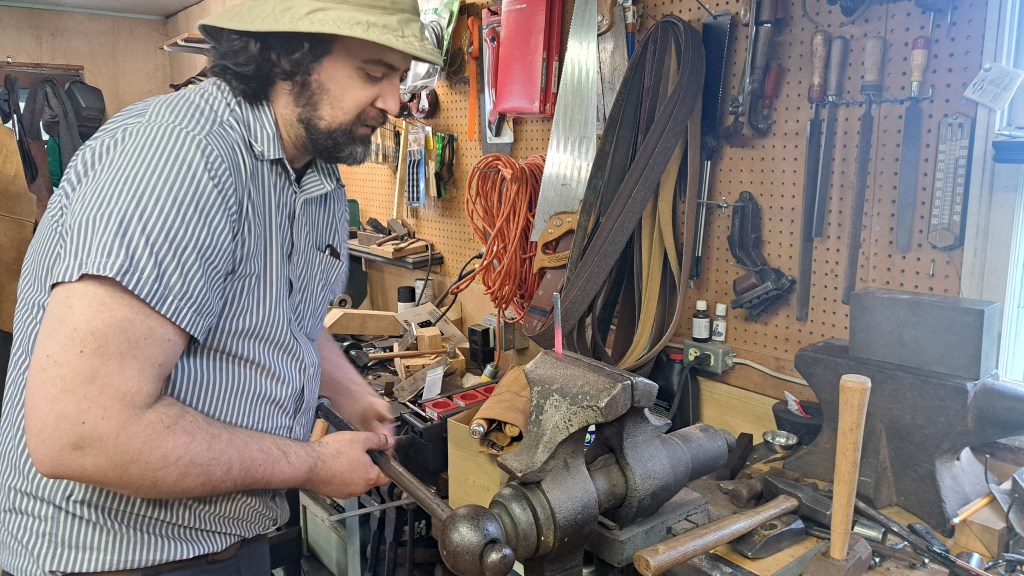
As part of my research and reconstruction of the Dominy’s wheel cutting engine, I visited the machinist, metalsmith, and conservator Daniel Ravizza. Daniel very kindly taught me the basic blacksmithing techniques the Dominy’s (or associated blacksmiths) used to make the wheel cutting engine.
This included:
- Drawing – thinning the material out to be longer
- Bending – shaping the material into a curve
- Upsetting – shortening and thickening the material by forcing it into itself
- Piercing – forcing a sharp tool through the material to open up a hole
- Punching – forcing a die into the material to remove a slug and create a hole
- Splitting – using a sharp edge to break a piece into two, or to slice a piece in to parts
- Forge Welding – using more heat, and a flux (borax), to join two sections of material together
I regret not taking more photos, but essentially Daniel would describe and demonstrate the technique, then I would try to replicate it myself. He is a good teacher and gave productive instructions.
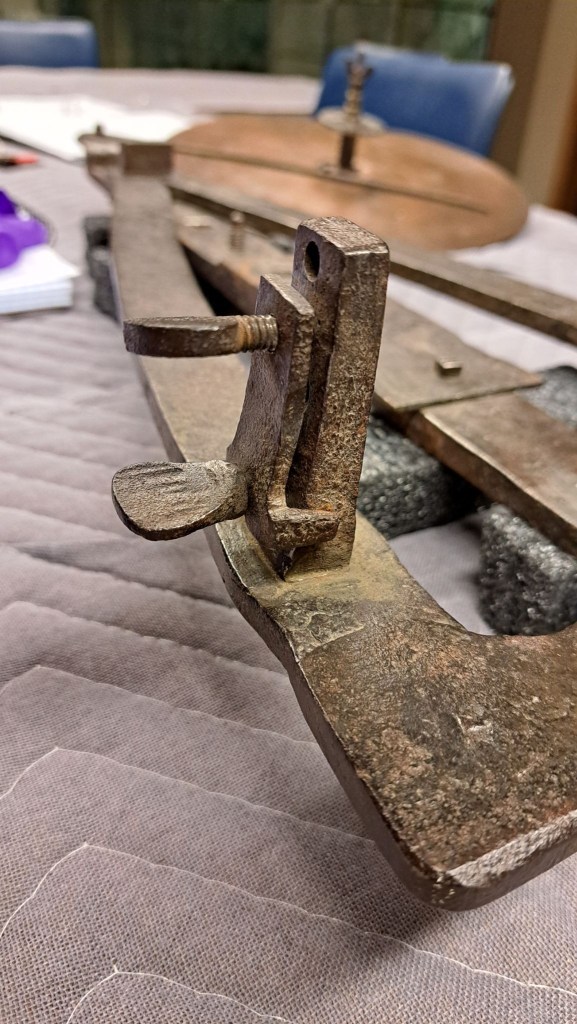
I won’t go over all that I learned, but we started with drawing: After heating the material to red, when it is soft enough to be easily worked but not melting or burning, hitting the iron with a hammer will cause it to flatten, get thinner, and ultimately elongate as the thickness lessens and the length increases. The flatness of the hammer and anvil causes the material to draw flat, but it can be turned 90 degrees to form a square, or by eighths to an octagon. Daniel showed me how to use that process to transform a flat bar section into a rough cylinder. When cold, that cylinder could be filed closer to round and threaded to screw or bolt into something, as on the Dominy’s engine’s frame.
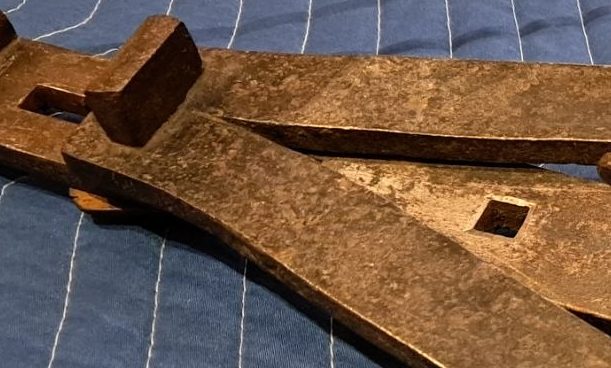
We practiced bending both over the anvil and in a vice (as shown above), to get a feel for how different techniques yield different bends.
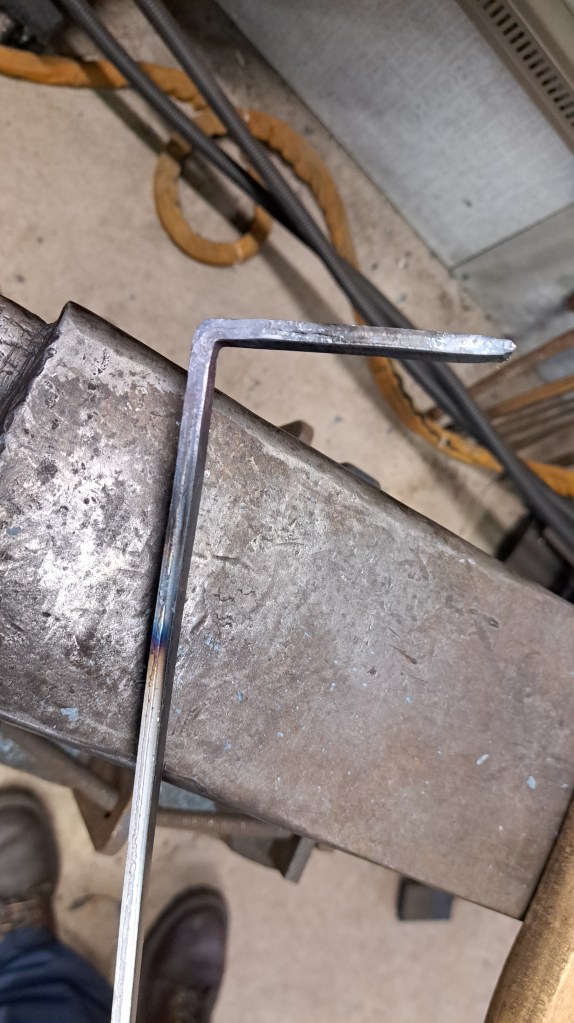
When bending, the material on the outside of the curve has to strech and therefore thins out. To fix this thinning-out, blacksmiths sometimes take the extra time to upset material back onto the outside of the bend. This requires more time and care, but yields a better looking bend. I had difficulty doing this well, but it was worth learning because whoever made the Dominy’s wheel cutting engine may have employed this technique.
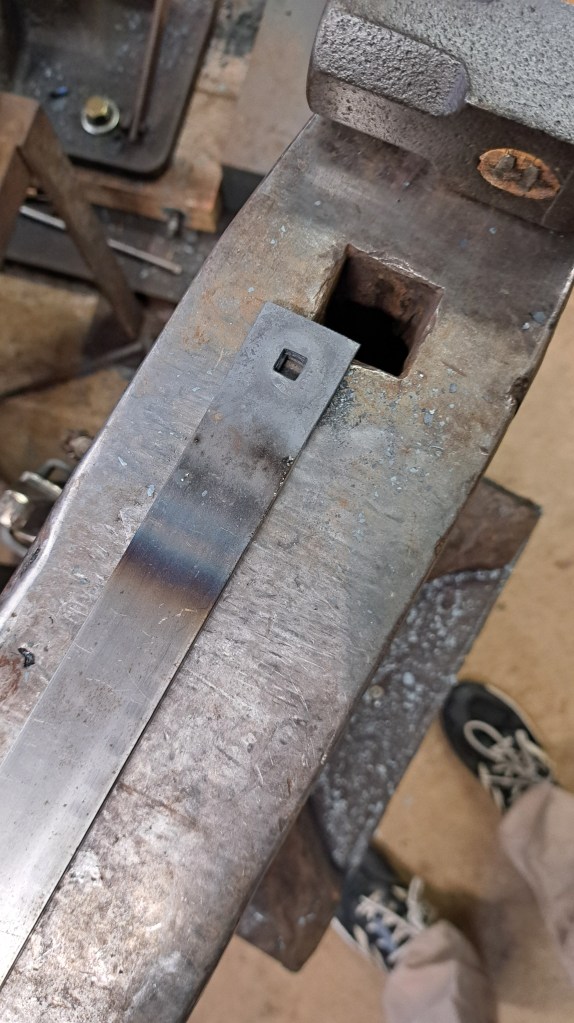
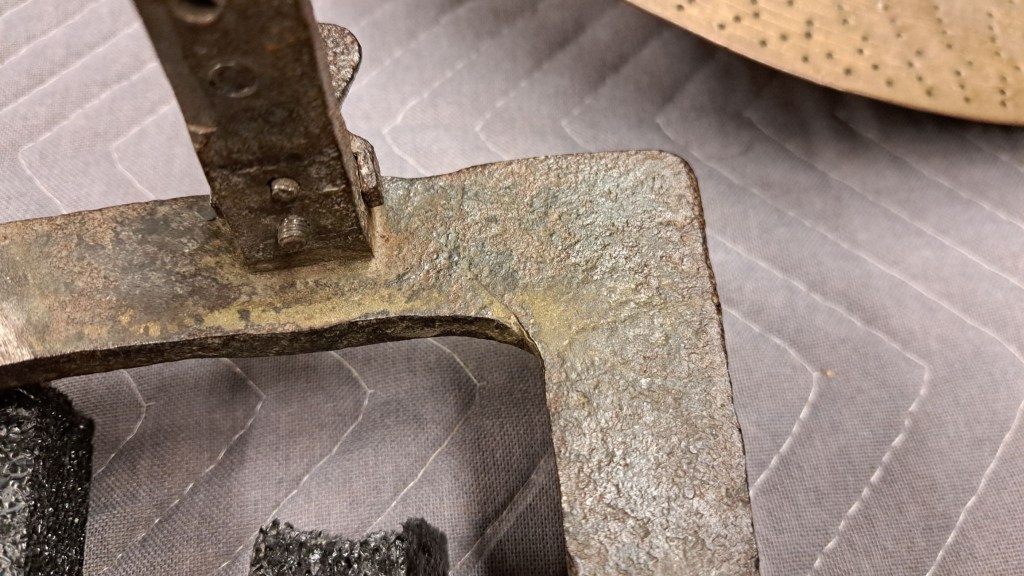
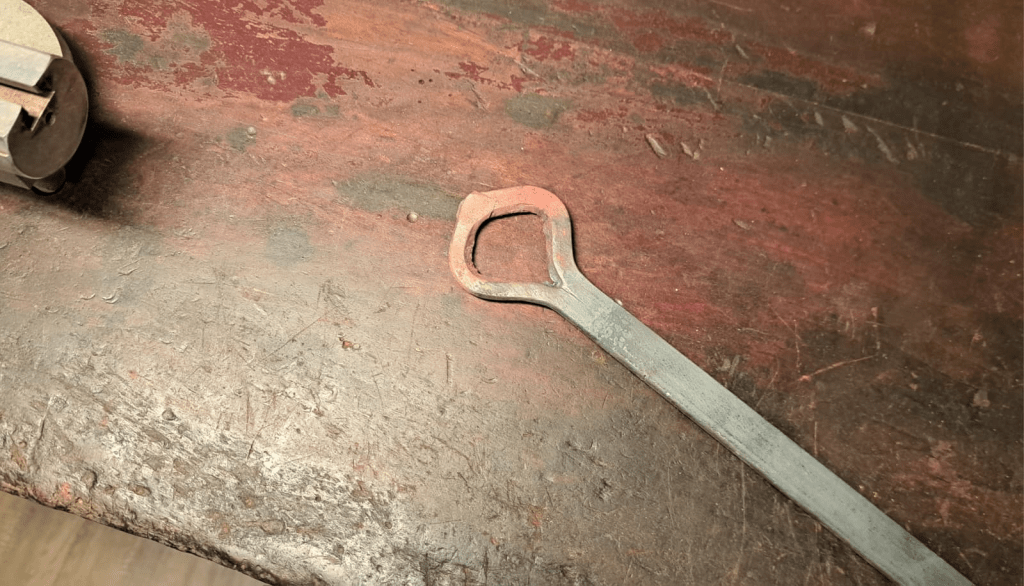
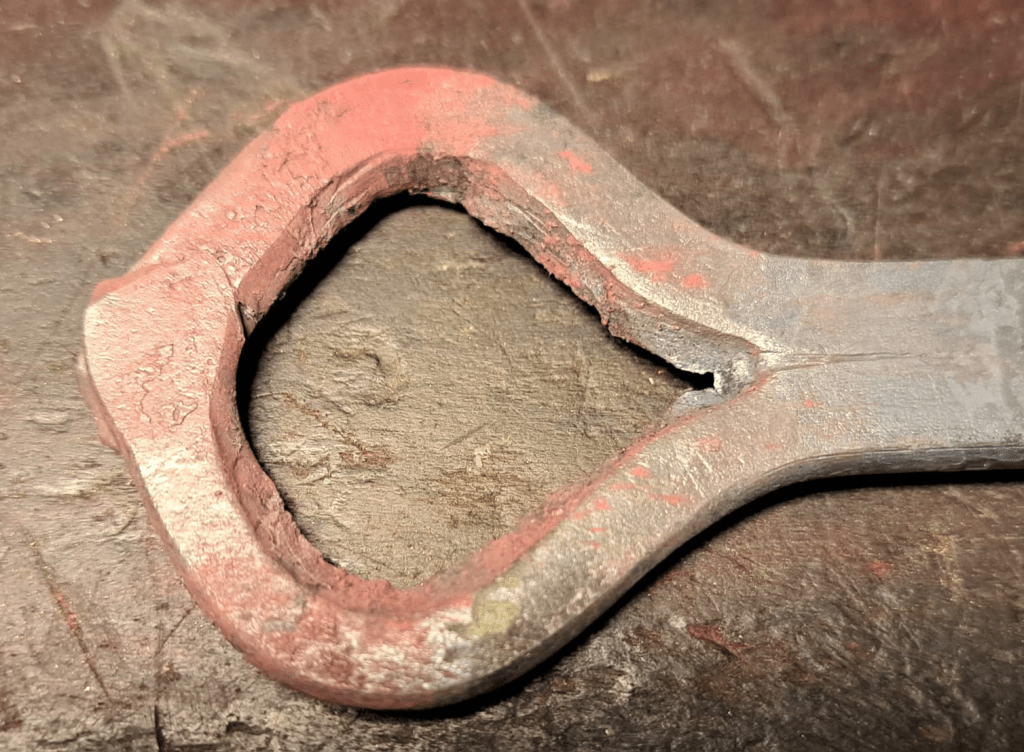
I was keen to get a sense of piercing and punching, as they are two hot-working techniques (done when the iron is hot) that are foreign to someone like me who had only really worked iron when it is cold. Punching requires a die of the right shape forced through powerful blows into the hot material. After it has sunk about 2/3rd of the ways through, the material is flipped over and punched from the other side until a corresponding slug pops out and the hole is created. It was quicker than I thought, but can employ two people because a second person can help hold the punch, or the material, while the other person drives the punch into the material with a hammer. This social aspect is interesting to me.
After punching a square hole, we worked together to punch a slot (shown above). This may have been how the slots in the engine’s base were created. Note how the material swelled on the sides.
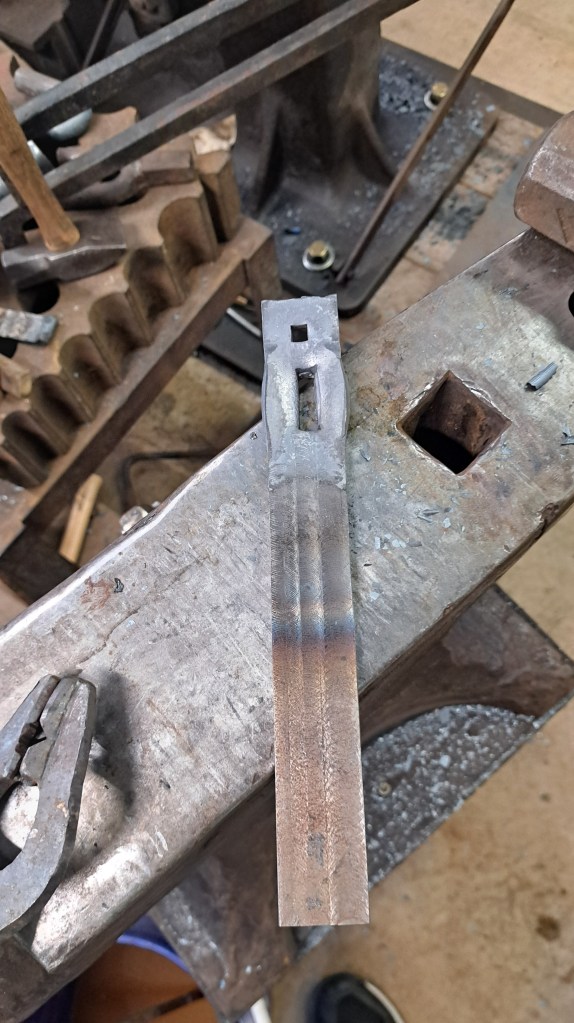
As a culmination of my basic training, and a piece of experimental archaeology, we created a piece employing several techniques that models how the triangular frame piece of the engine may have been wrought:
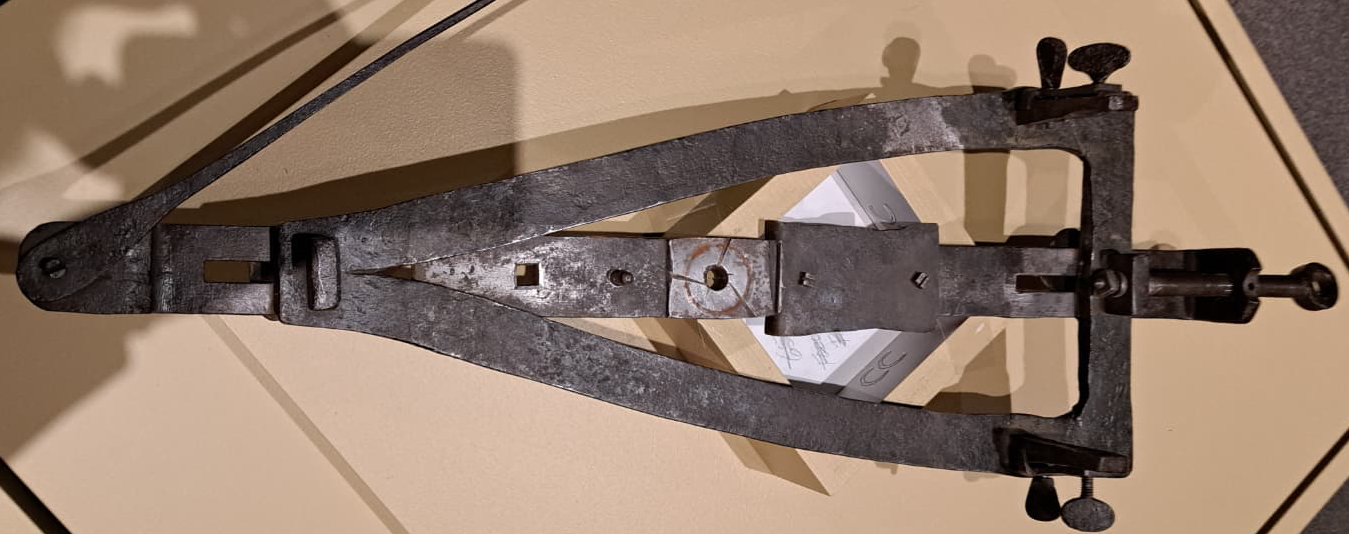
The triangle consists of once acute point, formed as shown above, and two right angles as shown below. The right angles show evidence of scarf joints, where two pieces of metal have been forge welded. To achieve this, the two pieces are thinned into a wedge where they will be joined such that when they are joined the piece is not thicker where the joint is. Noticing this, Daniel showed me how to forge weld.
Because the triangle appears to be split from one wide piece at the acute point, he also showed me how to split a piece like that using a splitting or hot chisel. This was again a two person job with one person holding the tool and the other swinging the hammer. To mimic the triangle frame in a smaller and simplified form, we split a piece of material into two strands, achieving a look quite similar to the acute end of the triangle, then I bent out and thinned the ends of the split ends and forge welded them myself.
I was very happy the forge weld took and am pleased at the look of the scarf joint. The look of the scarf joints and the split end with the line compares well with the actual triangular frame on the engine.
I want to again thank Daniel for teaching me and discussing all this! Now to reconstruct the whole frame…

Leave a comment