Here’s a collection of some of my old projects.
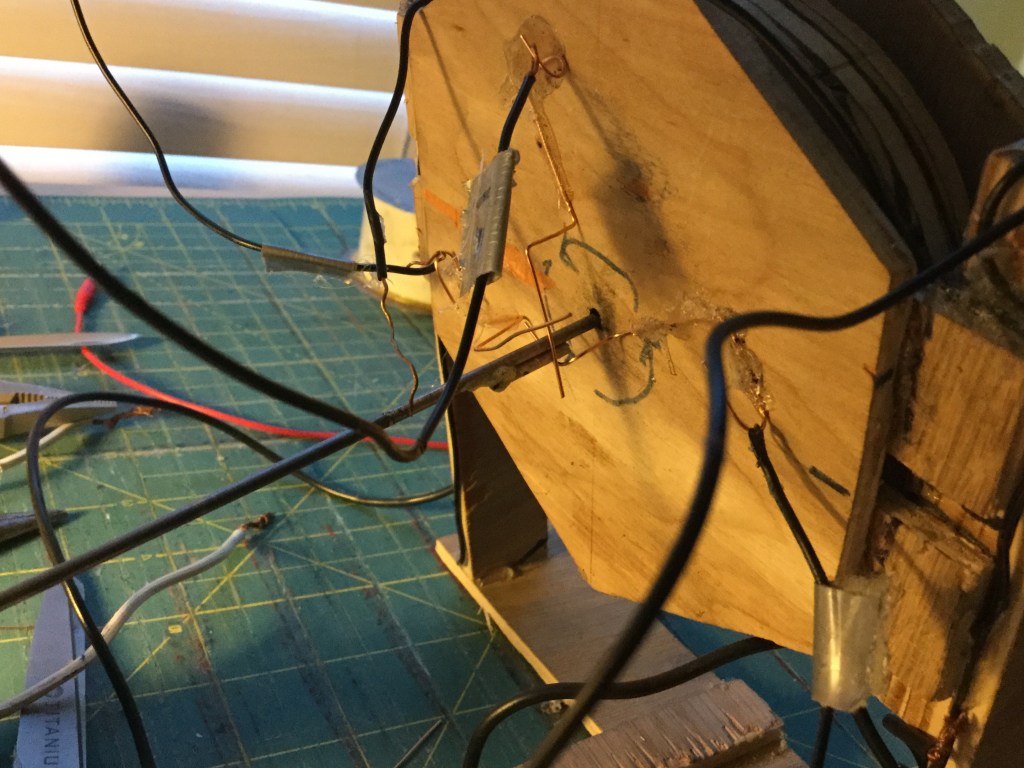
I think I made the solenoid motor in middle school, maybe 8th grade. I wanted to make a solenoid motor rather than the conventional style of electric motor with a rotating armature of windings because it was easier to see how the windings powered the motor. The coils of wire attract the metal pistons when a current is applied. The geometry of forces is more intuitive in my opinion – though much less efficient.
While the cylinders, pistons, and flywheel arrangement was easy to make, the difficulty came in timing the flow of current to turn on the coils at the right time so as to induce a rotation. The apparatus to achieve this is called a commutator. You can see my first attempt at the beginning and end of the above video. I bent a coat hanger into a ring divided into three sections, each corresponding to one cylinder. A wiper attached to the central shaft completed a circuit with one of the cylinders while it was in contact with the corresponding section of the ring. To power the motor I used a model train transformer.
This commutator system had a lot of friction and just barely worked, so I played around with different designs. I remember trying to use a big cam and real micro switches at one point, but this also had too much friction.
In the end I used the same thin magnet wire from the coils arranged in a sort of triangle around the shaft. I then soldered a little bump onto the shaft which would touch the wires and complete the circuits as it rotated.
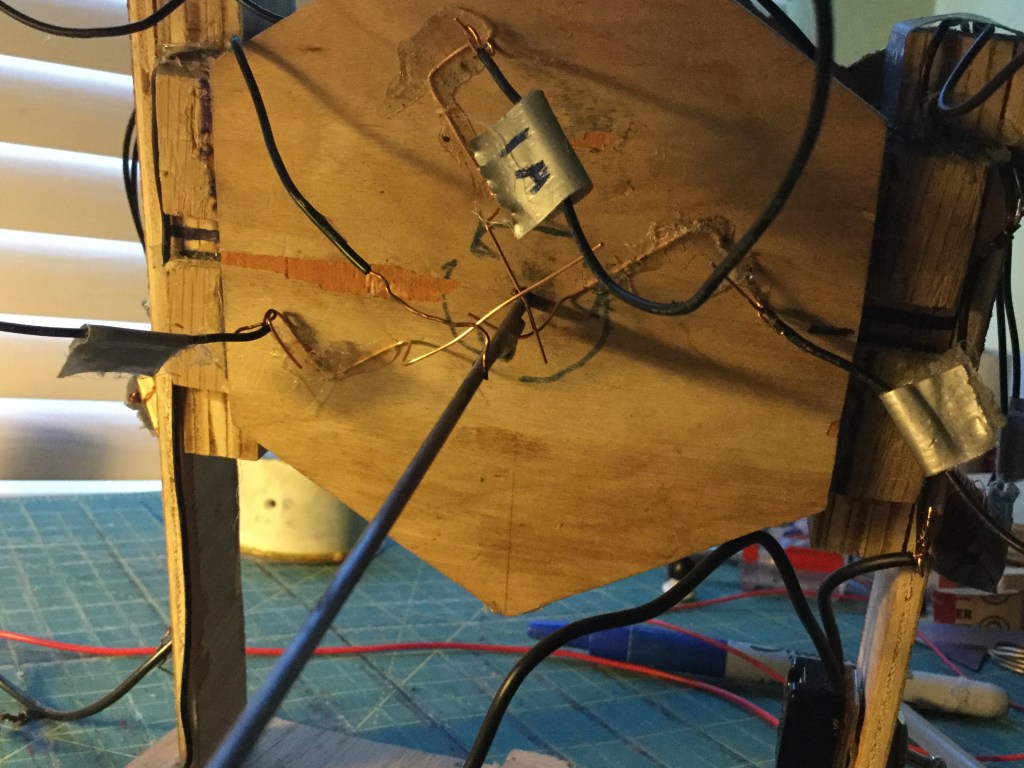

This had much less friction and allowed the motor run quicker.
I think I made the stirling engine around the same time as the solenoid motor. Stirling engines are very neat. They are a heat engine and rely on a temperature difference to expand a fluid and create mechanical work, like a steam engine, but stirling engines are a closed-loop system. This means the fluid (regular air, in this case), never leaves the system. A displacer within the main body of the engine continuously shifts the same air from a high temperature to a low temperature, causing it to expand and contract over and over. This causes a power piston (the bit on the right of my engine) to push out and in, rotating a crank and flywheel assembly. This rotation is what powers the displacement piston within the body of the engine, further shifting the air within. In my arrangement, the candle below heats the bottom plate of the engine and ice cools the top plate. The air within contacts the top or bottom plate and thus contracts or expands. In theory, stirling engines can be very efficient and operate on fairly low heat differentials, but I was disappointed that I needed ice to get mine to run.
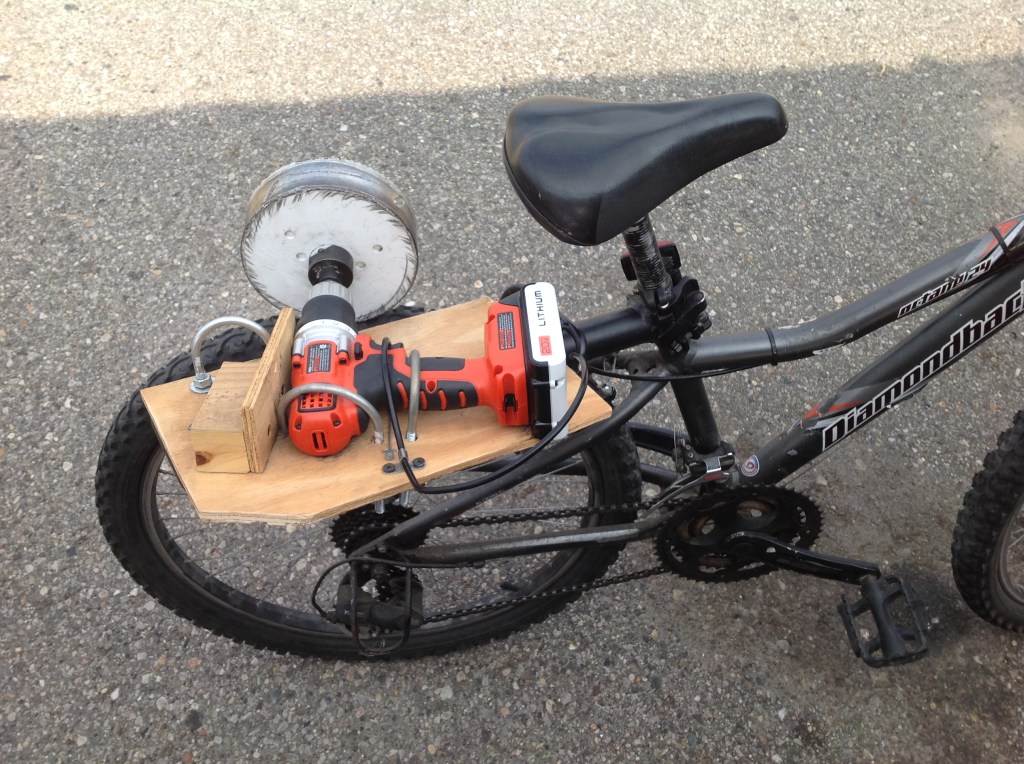
I made the drill bike with my dad, probably also in middle school. We used a giant hole saw for the drive wheel and looped the rear brake line around the drill trigger to control throttle from the handlebars. I took it to the maker faire at the Henry Ford Museum that year. I thought it was so cool (and still do!)
Addendum: A word on materials.
Most of the materials for these projects were scrounged.
The wood of the motor frame, flywheel, connecting rods, and cylinder casing was probably scrap from my uncle’s carpentry shop. The motor shaft was coat hanger wire, as was the commutator wires. The pistons were nails that I hacksawed the end off of and sanded smooth. I put thinner coat hanger wire through a hole I drilled into the nails to act as a wrist pin (I think I soldered them in place as well).
On the stirling engine side, the metal plates on the top and bottom were probably from some tin can. The body was an off-cut of PVC pipe. The power “piston” was a bit of balloon over a bottle cap to act as a bellows. The crank shaft was more coat hanger wire.
Each did require some special materials though, and I remember that it was only once I got these that I could see how I could make these devices.
The solenoid motor required thin wire for the windings called magnet wire. With the help of my sister I bought some online and I still have the rest. I think it’s 28 gauge. In hindsight, I could’ve harvested some similar wire from an old transformer or other motor.
The stirling engine called for a well-fitting tube to go around the shaft that holds the displacement piston. I think I used the small tube found on the tip of a mechanical pencil and some piano wire I found at Home Depot. The fit was crucial so that it did not take much force to move the displacer, but also that the pressure within could be contained.
For the bike, the hole saw was bought specifically for that purpose. I can’t even imagine using that to drill a real hole (I’m assuming it’s just for drywall?). I remember we experimented with wrapping the outer surface of the hole saw in tape and inner tubes.

Leave a comment